
Sauces & Condiments
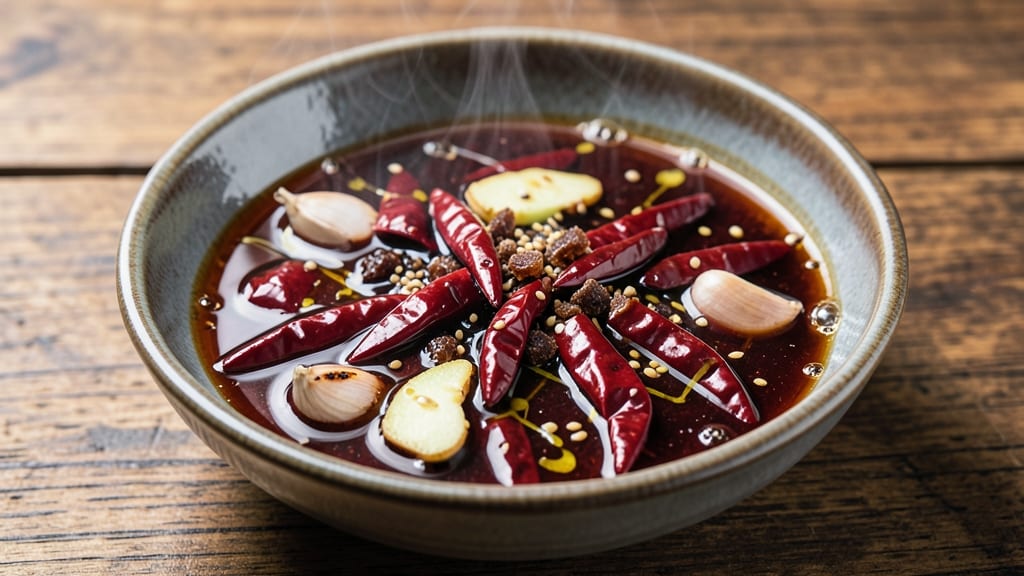
This Asian pepper sauce recipe transforms simple pantry staples into a vibrant, fiery condiment that adds depth to everything from stir-fries to grilled meats. The secret lies in balancing heat with sweetness—fresh chili peppers simmered with garlic, ginger, and vinegar create a sauce that’s both complex and addictive.
I’ve perfected this version to deliver bold heat without overpowering, making it versatile enough for dipping, marinating, or drizzling over noodles.
The process is straightforward: blend fresh chilies with aromatic ingredients, then simmer until the flavors meld into a smooth, glossy sauce. A touch of sugar or honey rounds out the heat, while a final blend ensures a silky texture.
Unlike store-bought versions, this recipe lets you control the spice level—adjust the chili quantity to suit your taste. The result? A sauce that’s restaurant-quality but easy to replicate at home, with a shelf life of up to 2 weeks in the fridge.
What sets this sauce apart is its versatility. Use it as a dipping sauce for spring rolls, a marinade for tofu or chicken, or a finishing touch for ramen or fried rice.
The bright, tangy flavor cuts through richness, while the subtle crunch of celery (optional topping) adds texture. It’s the kind of condiment that elevates simple dishes into something extraordinary—without requiring advanced techniques.
Ready in just 30 minutes, this sauce is perfect for meal prep or last-minute flavor boosts. The ingredients are minimal but impactful, ensuring every batch delivers consistent, bold results.
Whether you’re a home cook or a seasoned chef, this recipe will become a staple in your kitchen. Let’s get started!
Ingredients for asian pepper sauce
Nine essential ingredients blend fiery heat with aromatic depth for restaurant-quality Asian pepper sauce.
| Ingredient | Amount | Notes |
|---|---|---|
| Fresh Chili Peppers 🌶️ | ½ lb | Bird's eye or Thai chilies for heat |
| Garlic Cloves 🧄 | 6 cloves | Freshly minced for aromatic depth |
| Fresh Ginger 🌿 | 2 tbsp | Finely grated, organic preferred |
| Rice Vinegar 🍶 | ½ cup | White or seasoned variety |
| Dark Brown Sugar 🍬 | ¼ cup | For caramelized sweetness balance |
| Sesame Oil 🫒 | 2 tbsp | Toasted for nutty aroma |
| Low-Sodium Soy Sauce 🍜 | 2 tbsp | Kikkoman preferred for balance |
| Fresh Celery Stems 🧅 | 2 whole | For crunchy celery crown |
| Red Chili Flakes 🔥 | 1 tbsp | Adjustable for extra heat |
| Sesame Seeds 🌰 | 1 tbsp | Toasted for garnish texture |
The chili peppers are the heart of this sauce—Thai bird's eye or serrano deliver the perfect balance of heat and complexity. Local Asian markets often carry these fresh, but any grocery store's produce section will have them. Look for peppers that are firm and vibrant, not wilted. The garlic and ginger should be organic whenever possible—their freshness directly impacts the sauce's depth. For the rice vinegar, Mae Ploy or Koyo brands are my go-to for that bright, clean acidity that cuts through the richness. If you can't find these, any good-quality white vinegar works in a pinch.
No fresh chilies? Red chili flakes or cayenne powder can substitute at half the amount, but expect less complexity. Swap brown sugar for honey or maple syrup if preferred—just reduce by 20% to avoid over-sweetening. Sesame oil is non-negotiable for that nutty aroma, but if you're avoiding sesame, toasted peanut oil works surprisingly well. The celery crown is optional but adds that signature crunch—substitute with thinly sliced green onions if needed. For extra heat, add 1-2 tbsp of gochujang, the Korean fermented chili paste, but omit the sugar adjustment.
This sauce develops better with time—let it sit at room temperature for 30 minutes after blending before serving. Store in an airtight container in the fridge for up to 2 weeks, though the flavor actually improves over time. For the celery crown, keep it separate until serving to maintain crispness. Freeze portions in ice cube trays for 3 months—perfect for quick flavor boosts. The sauce thickens as it cools, so thin with a splash of water or vinegar if needed before using.
Why You'll Love This Recipe
- Five-Ingredient Magic: I swear by this—no fancy techniques, just chop, pulse, and simmer. The chili peppers and ginger hit the blender while I’m still deciding what to eat for dinner.
- Sweet Heat Balance: That first taste of rice vinegar cutting through the brown sugar’s richness? Chef’s kiss. The garlic lingers just enough to make it irresistible, but the chili peppers bring the real punch—exactly how I like it.
- Dip, Drizzle, Repeat: I keep a jar in the fridge for everything: grilled chicken, noodles, even scrambled eggs. It’s my go-to for weeknight meals when I’m too tired to think past "make it stop."
- Budget-Friendly Fire: Fresh peppers and ginger might sound pricier, but they stretch further than store-bought sauces. Plus, the sugar and vinegar? Pantry staples. I’ve made gallons of this for under $5.
Step-by-step instructions for Asian pepper sauce
This vibrant sauce balances heat, sweetness, and umami with precise technique.
🍳 Step 1: Prepare the Chili-Garlic-Ginger Base
Heat a small saucepan over medium-high heat and add the 2 tablespoons sesame oil. Once shimmering, add the 0.5 lb fresh chili peppers, 6 cloves garlic cloves, and 2 tablespoons fresh ginger. Cook for 5-6 minutes, stirring frequently, until the peppers soften and the garlic becomes golden brown—this builds deep aromatic complexity.
Watch closely as the peppers release their oils and the garlic transforms from pale to nutty brown. If the mixture starts to smoke excessively, reduce heat slightly. The goal is to develop flavor without burning, as charred aromatics can turn bitter. Remove from heat and let cool slightly before proceeding.
🍳 Step 2: Simmer with Vinegar and Sugar
Return the pan to medium heat and add 0.5 cup rice vinegar and 0.25 cup dark brown sugar. Bring to a gentle boil, then reduce to a simmer for 8-10 minutes, stirring occasionally, until the mixture thickens slightly and the sugar caramelizes. You'll notice the sauce darken and develop a glossy sheen.
This step creates the sauce's signature balance—vinegar's tang cuts through the heat while sugar caramelizes into rich molasses notes. If the sauce thickens too quickly, add 1-2 tablespoons water to maintain proper consistency. The sauce should coat the back of a spoon but remain pourable.
🥘 Step 3: Finish with Soy Sauce and Chili Flakes
Remove from heat and stir in 2 tablespoons low-sodium soy sauce and 1 tablespoon red chili flakes. Let the mixture steep for 5 minutes to allow the flavors to meld completely. The sauce should now have a deep red hue with visible flecks of chili and garlic.
Taste and adjust seasoning—add more soy sauce for umami depth or additional chili flakes if you prefer more heat. The sauce should be bold but balanced, with heat that lingers without overwhelming. For best results, let it cool completely before serving.
👨🍳 Step 4: Prepare the Celery Crown Garnish
While the sauce cools, prepare the celery crown topping by slicing the 2 whole fresh celery stems into ¼-inch thick rounds. Lightly toast the 1 tablespoon sesame seeds in a dry skillet over medium heat for 1-2 minutes until fragrant and golden.
This crispy celery garnish adds a refreshing contrast to the rich, spicy sauce. The toasted sesame seeds contribute nutty depth that complements the peppery heat. Store the sauce in an airtight container in the refrigerator for up to 1 week, though it's best used within 3-4 days for maximum freshness.
Pro Tips For Making Asian Pepper Sauce
- CHAR THE GINGER: Blanch the ginger slices in boiling water for 30 seconds first—it softens them instantly and prevents that stubborn, chewy bite you get when the sauce turns out uneven. (Yes, even if you’re impatient like me, this step makes a real difference.)
- PEEL GARLIC IN ADVANCE: Mince the garlic cloves before you start cooking and store them in a bowl of cold water until use—keeps them from turning bitter or sticking to your knife. I learned this the hard way after one batch tasted weirdly metallic.
- LOW AND SLOW WITH PEPPERS: Simmer the chili peppers on low heat after the initial sear, or they’ll burn before releasing their sweetness. Cover the pan halfway through to trap steam—this keeps the sauce from turning bitter and ensures the peppers break down properly.
- SWEAT THE SUGAR FIRST: Toast the brown sugar in a dry pan for 2-3 minutes until it smells caramelized, then dissolve it in the rice vinegar before adding to the sauce. This cuts the sharp acidity and adds depth—skip this, and the sweetness will taste one-dimensional.
Essential equipment for perfect results
Small Saucepan
I use a 3-quart stainless steel saucepan—like the All-Clad Stainless 3-Quart Saucepan—for its even heat distribution and durability. The sloped sides prevent spills when stirring, and the tight-fitting lid helps concentrate flavors during simmering.
A non-stick interior isn’t necessary, but it makes cleanup easier if any sugar caramelizes too aggressively. 🔥
Immersion Blender
For ultra-smooth texture, I blend the cooled sauce directly in the pan using a Cuisinart Immersion Blender. This eliminates the need for transferring hot liquid to a blender, reducing mess and risk of burns.
If you prefer a traditional blender, use a high-speed Vitamix or Ninja—just let the sauce cool completely first to avoid splattering. 💫
Fine-Mesh Strainer
A Heston Blumenthal Fine-Mesh Strainer helps remove any unwanted seeds or skins from fresh chilies before cooking. This step is optional but ensures a silky-smooth sauce without gritty textures.
For extra refinement, line the strainer with cheesecloth to catch even finer particles. I skip this if using dried chilies or flakes, as they’re naturally smoother.
Measuring Spoons
Precision matters with spices and oils—OXO Good Grips Stainless Steel Measuring Spoons are my go-to for accurate measurements. The ½-teaspoon and ¼-teaspoon sizes are essential for adjusting heat levels with red chili flakes or sesame seeds.
I keep these within arm’s reach while cooking to tweak seasoning on the fly. ✨
Celery Slicer
For the celery crown topping, a mandoline slicer like the OXO Good Grips ensures perfectly even ¼-inch-thick rounds every time. If you don’t own one, a sharp Japanese-style chef’s knife and steady hand work just as well.
Thin, consistent slices crisp up beautifully when lightly toasted, adding that signature crunch. 🧅
Air-Tight Storage
Store the sauce in glass mason jars with screw-top lids—like the Ball Mason 16-Ounce Jars—to preserve freshness for up to 2 weeks. The glass won’t absorb odors, and the tight seal prevents oxidation.
For longer storage, freeze in silicone ice cube trays (like OXO Good Grips) for 3-month portions, perfect for quick flavor boosts. ❄️
Nutrition facts
Frequently asked questions
Can I make this Asian pepper sauce without fresh chili peppers?
Yes! Substitute 1 tablespoon red chili flakes or ½ teaspoon cayenne powder for the fresh peppers, but reduce the cooking time to 3-4 minutes to avoid burning. For deeper flavor, add 1 teaspoon gochujang (Korean chili paste) along with the soy sauce. The texture will be smoother but slightly less vibrant.
How do I adjust the heat level in this sauce?
For milder heat, reduce fresh chilies to ¼ lb or omit the red chili flakes entirely. For extra spice, add 1-2 extra tablespoons of chili flakes or ½ teaspoon of crushed Sichuan peppercorns (for a numbing kick). Always taste as you go—heat builds as the sauce cools!
Can I use this sauce as a marinade for meat or tofu?
Use it undiluted for 15-30 minutes for quick flavor, or thin with 2 tablespoons soy sauce and 1 tablespoon honey for a longer 30-minute marinade. The acidity in the vinegar tenderizes proteins, while the spices add depth. For grilled meats, brush on just before cooking to avoid overpowering.
Why did my sauce turn out too thick/thin?
If too thick, thin with 1 teaspoon rice vinegar or water at a time while stirring. If too thin, simmer uncovered for 2-3 extra minutes to reduce. The sugar-to-vinegar ratio is key—next time, reduce sugar by 1 tablespoon if you prefer tangier sauce. Stir frequently during simmering to prevent sticking.
What’s the best way to store leftovers?
Transfer to an airtight glass jar and refrigerate for up to 2 weeks. The flavors actually improve with time! For longer storage, freeze in ice cube trays—each cube equals 1 teaspoon of sauce, perfect for quick flavor boosts. Thaw overnight in the fridge before using. Never freeze with the celery crown.