
Sauces & Condiments
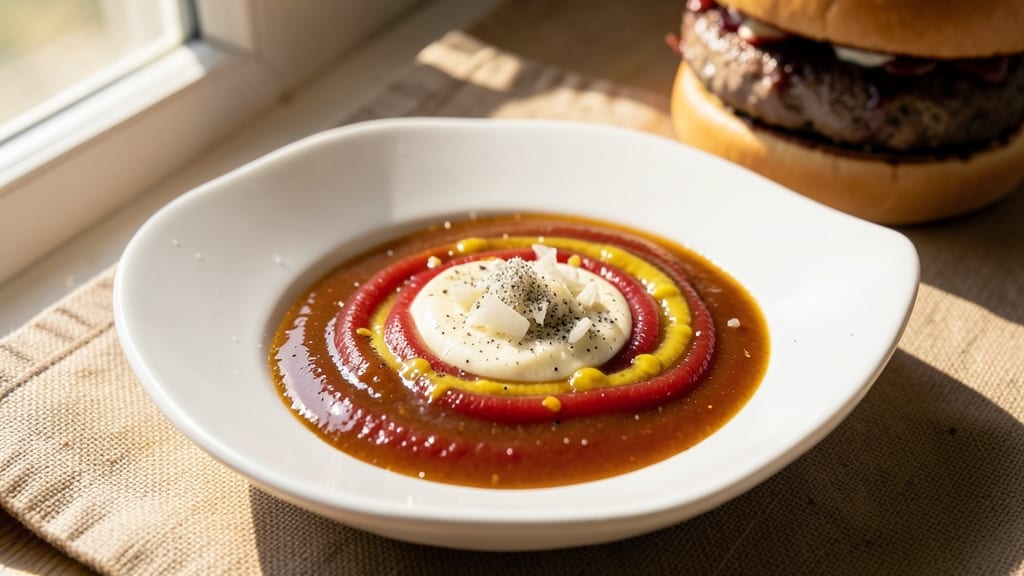
This Burger 21 sauce recipe delivers the signature tangy-sweet zing that makes every bite unforgettable—no secret ingredients, just a perfect balance of ketchup, mayo, and a touch of vinegar for that signature kick.
The sauce's creamy yet bright profile transforms ordinary burgers into restaurant-worthy masterpieces, and it's versatile enough to elevate sandwiches, fries, or even grilled chicken.
The magic lies in the emulsification process, where vinegar and spices work together to create a sauce that's both bold and smooth. Unlike store-bought versions, this recipe avoids artificial flavors, relying instead on a blend of garlic, onion, and a hint of mustard for depth.
The result? A sauce that clings perfectly to patties, adds moisture, and leaves your taste buds craving more.
What sets this sauce apart is its foolproof technique—no complicated steps, just a few pantry staples and 10 minutes of active time. The ingredients come together in a way that feels effortless yet delivers professional-quality flavor. Once you taste the difference, you'll never go back to bottled sauce again.
Best of all, the sauce keeps well in the fridge for up to two weeks, making it ideal for meal prep or hosting. Whether you're serving up classic cheeseburgers, loaded fries, or even a charcuterie board, this sauce will be the star of the show. Let's get started!
Ingredients for burger 21 sauce
Pantry staples blend into this iconic sauce—creamy, tangy, and impossible to resist.
| Ingredient | Amount | Notes |
|---|---|---|
| Mayonnaise 🥛 | ½ cup | High-quality, full-fat preferred |
| Ketchup 🍅 | ½ cup | Classic, no artificial flavors |
| White Vinegar 🍶 | ¼ cup | Distilled or apple cider vinegar |
| Yellow Mustard 🌶️ | 1 tbsp | Smooth, not chunky |
| Garlic Cloves 🧄 | 2 cloves | Fresh, minced finely |
| Onion Powder 🧅 | 1 tsp | Freshly ground preferred |
| Ground Black Pepper 🌶️ | ¼ tsp | Freshly ground for best flavor |
| Granulated Sugar 🍚 | 1 tbsp | White or light brown |
| Salt 🧂 | ½ tsp | Kosher or sea salt |
| Worcestershire Sauce 🍶 | 1 tbsp | Vegan-friendly if needed |
The mayo and ketchup form the base, so quality matters here. Duke's or Hellmann's mayo delivers the best texture, while Heinz ketchup is the gold standard for flavor consistency. Fresh garlic is non-negotiable—pre-minced from the jar lacks punch. For the vinegar, distilled is sharper, but apple cider adds subtle complexity. If you're watching calories, use light mayo but expect a slightly thinner sauce. The sugar balances the acidity, so don't skip it—light brown adds caramel notes if you're feeling adventurous.
No mayo? Greek yogurt thinned with water works in a pinch, though texture will differ. Substitute apple cider vinegar for balsamic if you prefer depth over tang. The Worcestershire sauce can be swapped for soy sauce plus a dash of molasses for a quick fix. Mustard hater? Skip it entirely—the sauce will still shine. For extra heat, add a pinch of cayenne or a dash of hot sauce. The key is emulsification: mix everything slowly to avoid separation. A hand mixer does the trick if you're impatient.
This sauce keeps beautifully in an airtight container in the fridge for up to 2 weeks. The flavors actually improve over time as everything melds. For meal prep, double the batch—it disappears fast. If the sauce separates, just whisk it back together. Freezing isn't recommended as texture degrades, but you can freeze portions for up to 1 month if needed. Label your container with the date to track freshness. Trust me, you'll want to make this weekly.
Why You'll Love This Recipe
- Here’s what sold me: the ingredients last. A little mayo and mustard go a long way, and the vinegar’s shelf-stable. I’ll make a big batch, store it in the fridge, and still have sauce left when the kids want burgers on a random Friday. Plus, it’s cheaper than buying specialty sauces for every meal.
- Five-Ingredient Magic: I swear by this—just mayo, ketchup, vinegar, mustard, and garlic. That’s it. No fancy gadgets, no last-minute grocery runs. The vinegar cuts through the richness while the garlic adds this je ne sais quoi that makes it taste like a proper diner sauce, not just store-bought glop.
- Garlic Kiss: Between us, the raw garlic cloves (yes, you mash them right in) are the secret. It’s not overpowering—just enough to make your burger taste like it was slathered by someone who actually cares. The vinegar brightens it up so it doesn’t turn greasy, even when you’re dipping fries later.
- Double-Duty Sauce: This isn’t just for burgers. I use it on hot dogs, chicken sandwiches, even as a quick dip for nuggets when I’m lazy. Honestly, I keep a jar in the fridge for weeks—it’s my go-to for anything that needs a little tangy punch without fuss.
Step-by-step instructions for burger 21 sauce
This tangy, balanced sauce comes together in minutes with precise technique.
Combine Base Ingredients
In a medium mixing bowl, whisk together the 0.5 cup mayonnaise, 0.5 cup ketchup, and 0.25 cup white vinegar until fully incorporated. The vinegar will initially separate, but keep whisking—it will emulsify into a smooth, slightly thickened base. This step is crucial for achieving that signature tang without making the sauce too thin.
I like to use a wire whisk for this to ensure everything blends evenly. If the mixture looks too thick after whisking, you can add 1 teaspoon of water to loosen it slightly while maintaining the proper consistency. The sauce should be thick enough to coat the back of a spoon but still flow smoothly when stirred.
Add Sweetness and Seasonings
Next, stir in the 1 tablespoon granulated sugar, 1 teaspoon onion powder, 0.25 teaspoon ground black pepper, and 0.5 teaspoon salt until completely dissolved. The sugar helps balance the acidity from the vinegar while enhancing the overall flavor profile. Taste at this stage—you should notice a bright, slightly sweet, and tangy foundation.
This is where the magic happens. The onion powder adds depth, while the black pepper provides a subtle heat that complements the richness of the mayonnaise. If you're using freshly ground pepper, you'll notice a more pronounced flavor—this is why the ingredients list specifies freshly ground whenever possible.
Incorporate Garlic and Mustard
In a small bowl, finely mince the 2 cloves garlic using a microplane or sharp knife. Add this to the sauce along with the 1 tablespoon yellow mustard and 1 tablespoon Worcestershire sauce. Stir well to combine, ensuring the garlic is evenly distributed. The Worcestershire sauce adds umami depth that ties all the flavors together.
Here's the thing—garlic can be polarizing. If you prefer a milder flavor, you can reduce the amount to just 1 clove, but I find the full 2 cloves gives that signature "Burger 21" punch. The mustard also helps to emulsify the sauce further, creating a smooth, cohesive texture that clings perfectly to burgers or fries.
Rest and Adjust
Cover the bowl with plastic wrap and let the sauce rest at room temperature for 15-20 minutes. This allows all the flavors to meld together and the emulsification to fully develop. After resting, give it one final taste and adjust the seasoning if needed—you might want to add a pinch more salt or a splash of vinegar to fine-tune the balance.
The resting period is often overlooked, but it makes a world of difference. The flavors will deepen and harmonize, resulting in a sauce that's far more complex than the sum of its parts. If you're short on time, you can proceed without resting, but the flavor will be slightly less refined.
Pro Tips For Making Burger 21 Sauce
- Mince the Garlic Fine: I learned this the hard way—lumpy garlic ruins the sauce. Use a knife to smash the cloves flat first, then finely chop them into tiny specks (think table salt size). This way, they blend smoothly and don’t leave gritty bits. No food processor? A mortar and pestle works, but chopping by hand gives you more control.
- Mix in Stages: Dumping all ingredients at once means a messy, runny sauce. Start with the mayo and ketchup, stir well, then add the mustard and vinegar. Finally, fold in the garlic. This keeps the texture thick and prevents separation. (Yes, even if you’re impatient like me.)
- Balance the Vinegar: Too much white vinegar makes the sauce taste harsh. Start with 1 tablespoon, taste, then add another if needed. The goal is a bright tang, not a pucker. If it’s still too sharp, a pinch of sugar (or even a dash of Worcestershire) smooths it out.
- Chill Before Serving: Skip this, and the sauce will taste flat. After mixing, refrigerate for at least 30 minutes—this lets the flavors meld. If you’re in a rush, pop it in the freezer for 10 minutes. The cold also thickens it just enough for that perfect burger drizzle. (Your future self will thank you.)
Essential equipment for perfect results
Mixing Bowl Essentials
Start with a medium-sized mixing bowl that comfortably holds 1.5 cups of liquid—glass or stainless steel bowls distribute heat evenly if you ever need to warm the sauce. I swear by my Pyrex glass bowl because it’s non-reactive and easy to clean.
Avoid plastic if possible, as it can absorb flavors over time. A wire whisk is your best friend for emulsifying the mayo, ketchup, and vinegar into a smooth base. 🥛
Measuring Tools
Precision matters here! Use a liquid measuring cup for the mayo, ketchup, and vinegar to ensure accurate ratios. For dry ingredients like sugar and spices, a spoon measure set (like the OXO Good Grips) keeps things tidy.
A microplane is ideal for mincing garlic finely—it’s faster and more consistent than a knife. Don’t skimp on these tools; they make all the difference in flavor balance.
Emulsification Helpers
If you’re impatient (or just love gadgets), a hand mixer or immersion blender speeds up emulsification. Pulse the mixture for 10-15 seconds to break up any separation. For a smoother texture, strain the sauce through a fine-mesh sieve after mixing to remove any garlic bits or lumps.
I keep a sieve with a small bowl underneath for easy cleanup—it’s a game-changer.
Storage Containers
Transfer the sauce to an airtight container (I use Glasslock containers) for fridge storage. These keep the sauce fresh for 2 weeks and prevent odors from seeping in. Label the container with the date—trust me, you’ll forget how long it’s been sitting there!
For meal prep, divide the sauce into smaller portions to avoid repeated opening and closing, which can introduce bacteria.
Optional Gadgets
Want to take it pro? A small food processor can blend the sauce to silky perfection in seconds, especially if you’re making a big batch. For garlic lovers, a garlic press ensures even distribution without overpowering the sauce.
If you’re hosting often, a squeeze bottle lets you drizzle the sauce neatly over burgers or fries—no messy spoons required. These extras aren’t mandatory, but they sure make the process easier. 💡
Nutrition facts
Frequently asked questions
Can I make this sauce without mayo?
Yes! For a lighter version, substitute ½ cup Greek yogurt (thinned with 1 tablespoon water) for the mayo. The texture will be slightly thinner but still delicious. For a dairy-free option, try vegan mayo or a mix of ¼ cup silken tofu blended with ¼ cup water—just whisk vigorously to achieve the same emulsified consistency.
Why does my sauce separate?
Sauce separation happens when oil (from mayo) and water (from ketchup/vinegar) aren't properly emulsified. Fix it by whisking vigorously or using a hand mixer for 10-15 seconds. For prevention, mix ingredients slowly and let the sauce rest 15 minutes before serving. If it separates again, add 1 teaspoon Dijon mustard—it acts as a natural emulsifier!
How spicy should this sauce be?
The recipe balances subtle heat from black pepper and garlic, but you can adjust it! For mild heat, reduce pepper to ¼ teaspoon. For extra kick, add ¼ teaspoon cayenne or ½ teaspoon hot sauce. Taste as you go—this sauce should complement, not overpower, your burger flavors.
Can I use this sauce on foods other than burgers?
This versatile sauce elevates fries, onion rings, grilled chicken, or even hot dogs. It’s also perfect for dipping mozzarella sticks or drizzling over loaded baked potatoes. The tangy-sweet balance works surprisingly well with charcuterie boards too—pair it with sharp cheddar and crackers for a crowd-pleaser!
What’s the secret to making it extra creamy?
For ultra-creamy texture, chill the sauce for 1 hour before serving—cold ingredients emulsify better. If it’s too thick, thin with 1 teaspoon water at a time. Pro tip: Use full-fat mayo and avoid overmixing after adding vinegar. The resting period (even 10 minutes**) lets flavors meld and thicken naturally.